- Here’s a have a well marbled Ribeye roast that’s been dry aged for 31 days at home. The process for dry aging beef at home isn’t very difficult, but requires a bit of investment and patience in order to achieve good results. You’re gonna need to invest in a dedicated mini fridge, a large cutting board, a pair of sharp knives (flexible filet knife, and a large Chef’s knife), as well as several sheets of cheesecloth.
- In regards to mini fridges, the one I use at home is the slightly larger units used for storing and chilling wine. They’re more spacious and allow for better air circulation, and don’t have a freezer compartment which could end up ruining the meat if placed too close to the freezer.
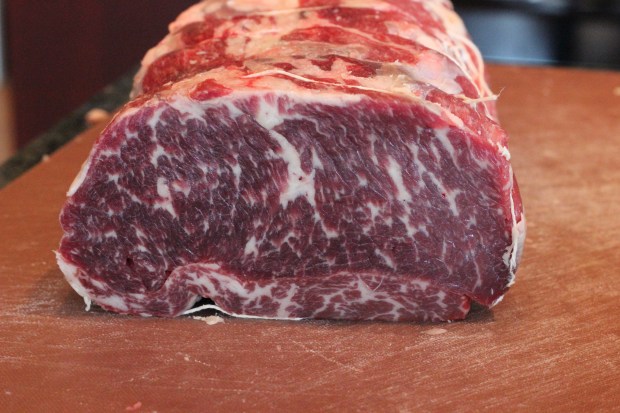
- The first step and probably the most important is to start with a good quality and well marbled roast, like the one I have here. If you try dry aging with a very lean or not a very well marbled piece of meat, you’re gonna achieve mediocre results. I tend to be very specific in regards to dry aging meat and only pursue it when I come across a well marbled piece.
- It’s better to purchase whole primal cuts, such as Ribeye or Striploin roasts that are in cryovac. It’s cheaper as you’re buying in bulk, and safer as you know the product hasn’t been tampered with somehow while it’s been vacuum sealed.
- You take it and remove the roast from cryovac, rinse it well under cold water and pat dry with paper towels until completely dry.
- Afterwards wrap the roast under two large sheets of cheesecloth and place the roast directly on the shelf inside your fridge. If your shelf isn’t a wire type, but a solid piece you should place a wire rack onto a sheet pan and your roast on top of the wire rack and than place it inside your fridge. The reason is to allow better air flow, so that your roast dry ages completely and evenly across it’s entire surface.
- During the first week or two of dry aging, you’ll be regularly changing your sheets of cheesecloth with new ones until the surface of your roast drys and develops a crust. Once a crust has formed, you no longer have to change your cheesecloth. Any old and soiled cheesecloth are discarded.
- Once every few days, rotate the position of your roast inside the fridge and monitor it’s progress. You’re checking to see if the meat is aging well and hasn’t spoiled. Spoiled meat will have a distinct, pungent and unpleasant smell to it along with the surface being sticky or slimy to the touch.
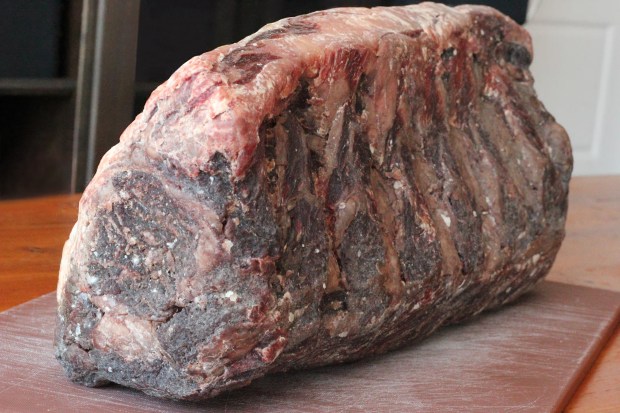
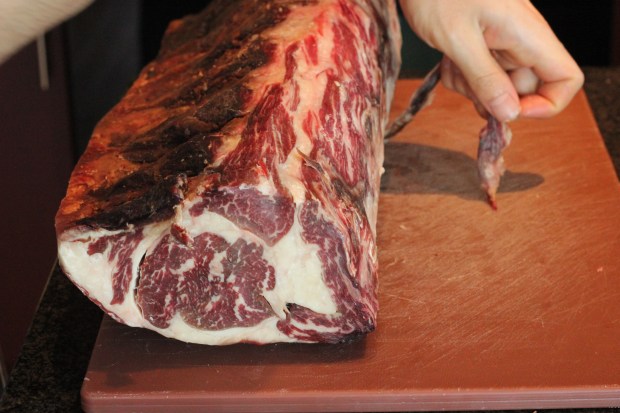
- After the first week, you should notice the exterior being a dark crimson red with some dark spots forming. After the second week, the exterior should form a dark crust and have a slightly funky smell to it. The smell should be reminiscent to blue cheese, leather, with a bit of funk to it. By the third week, the roast should have formed a firm and hard dark exterior, with the entire roast shrinking and slightly shriveled due to the natural moisture loss through evaporation. After the third or fourth week, your roast should be ready to be trimmed and butchered.
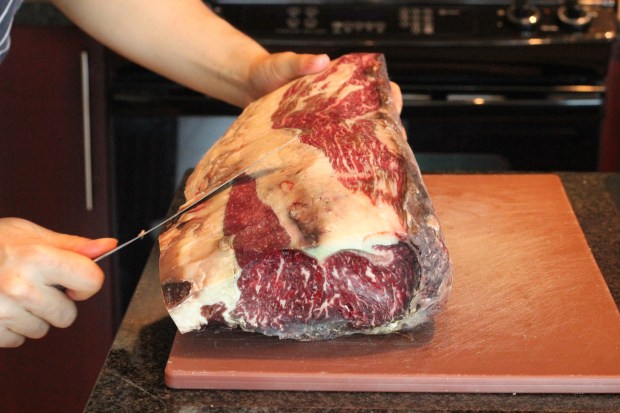
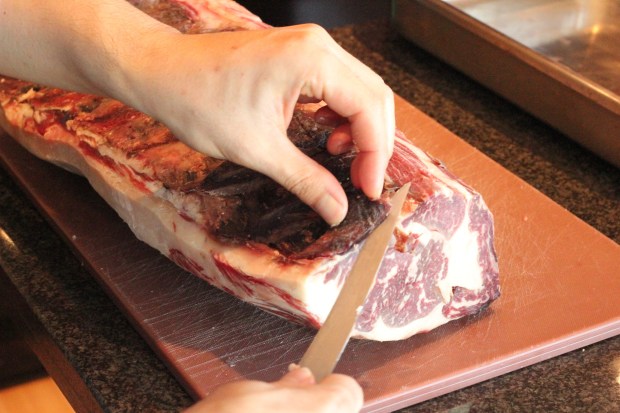
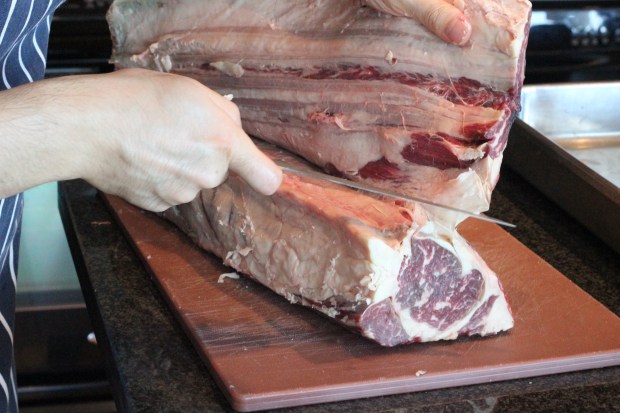
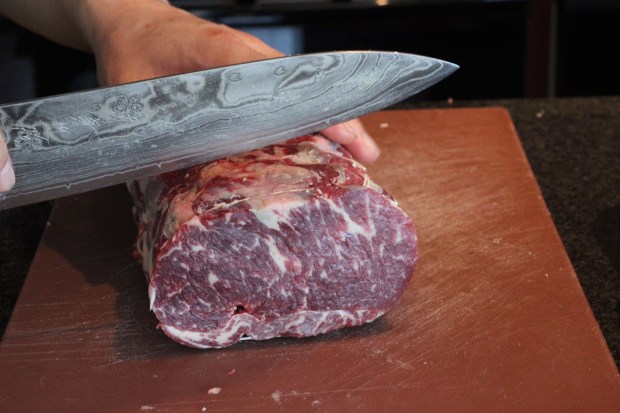
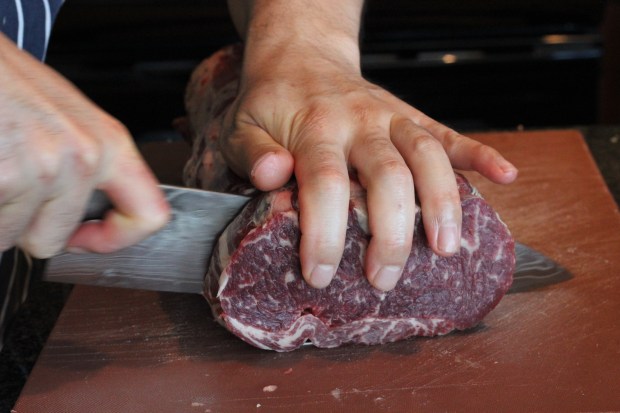
Here’s an outline of how to trim and butcher your roast after you’re done Dry Aging.
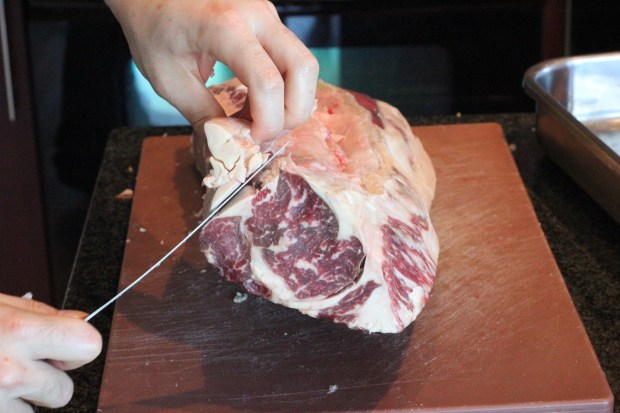
- Begin trimming off the two exterior side pieces using a large Chef’s knife or Butcher’s Scimitar.
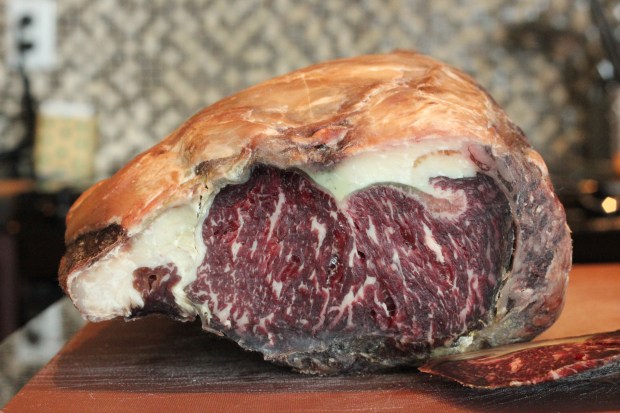
- Using a sharp filet knife, trim off the hard moldy exterior along with any excess fat.
- Separate the fat cap from the main loin.
- Trim off and remove the fat, sinew and silver skin from the fat cap.
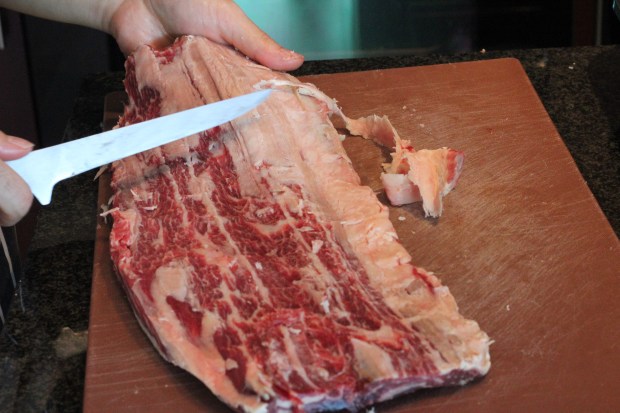
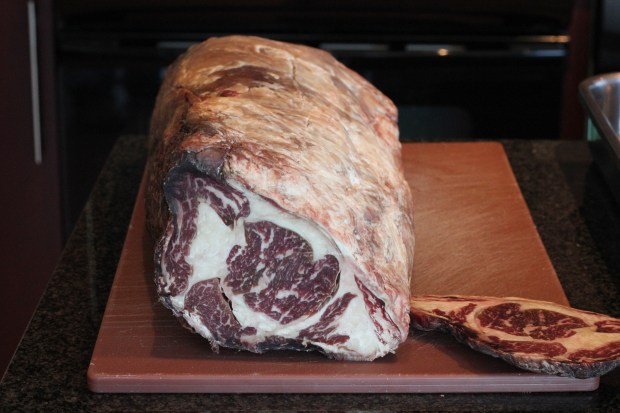
- Remove and trim off any excess fat along your main loin.
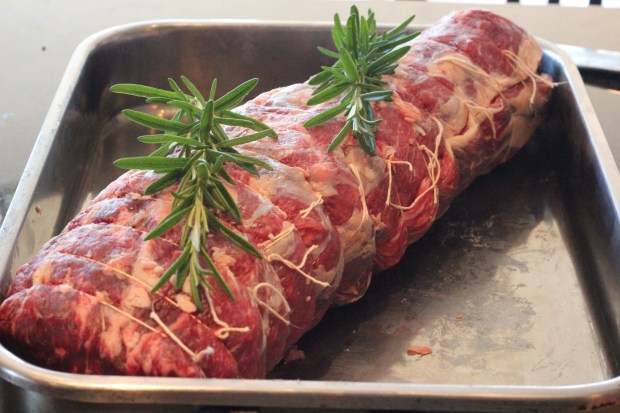
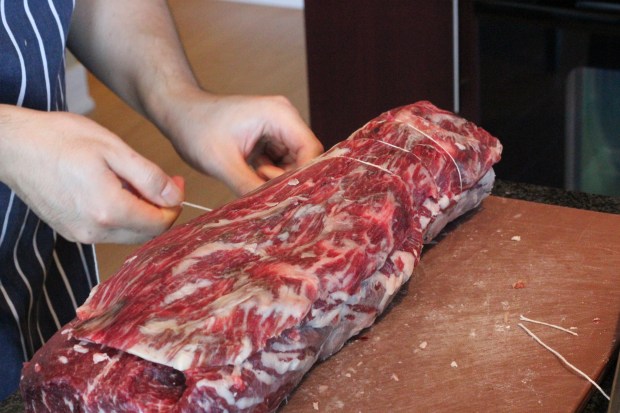
- Using butchers twine, carefully truss together the fat cap with the main loin into one piece. Truss the meat together in 1 inch intervals.
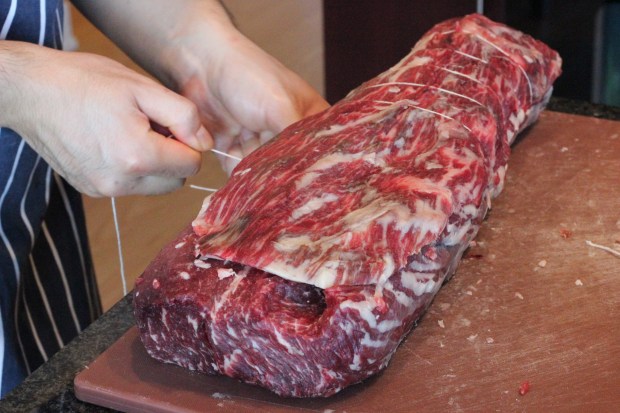
- You can now slice your roast into steaks.
- Or leave it whole, ready for roasting in the oven.